
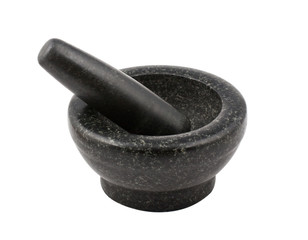
Have you ever asked yourself the question, how to cure a Mortar and pestle? Anybody who uses mortar and pestle in the kitchen is bound to have this question at one point or the other waiting for answers.
Not to worry because the essence of this article is to carefully explore the different techniques involved in curing a mortar and pestle to make it excellent for your use.
Well, before we proceed to answer the question, how to cure a mortar and pestle, it is important that we, first of all, understand what curing a mortar and pestle means in this concept.
Understanding the meaning of curing in this regard will enable us to properly learn to best ways and methods of curing a mortar before we proceed to use them in the kitchen.
As we know, mortar and pestle are very important equipment in the kitchen and it is often used for various purposes in the kitchen. If you fail to cure your mortar and pestle before using them, you will end up not getting the best of them.
The major uses of the mortar and pestle in the kitchen are:
- It can be used to grind up spices for curries and homemade spice mixtures
- It can equally be used to mesh ginger and garlic
- You can also use them to grind chillies for sauce, salsas and marinades
- It is especially useful during spicy cooking procedures.
Table of Contents
What is Curing of Mortar and Pestle?
As we have stated earlier, the uses and importance of the mortar and pestle in the kitchen above, it is also important that we let you know the meaning of curing of a mortar and pestle.
Have you ever wondered from the beginning of the topic, what curing got to do with mortar and pestle or did you ask yourself if the mortar and pestle were sick that they needed some cure?
Oh, I probably did have some questions before I came to understand properly what curing means in this context and its importance to the overall efficiency of the mortar and pestle.
Curing a mortar and pestle simply put is the act of removing tiny particles of rock from a newly purchased mortar and pestle so that when you start using them to grind your spices you won’t end up grinding rock particles into your food.
So curing a mortar and pestle before use ensures that you get rid of all the tiny rock particle that would have ended up in your food or in between your teeth.
Curing a mortar and pestle can also be called seasoning a mortar and pestle.
Why do you need to Cure a Mortar and Pestle?
Have you ever wondered why we needed curing for our mortar and pestle before we use it in grinding our spices for cooking?
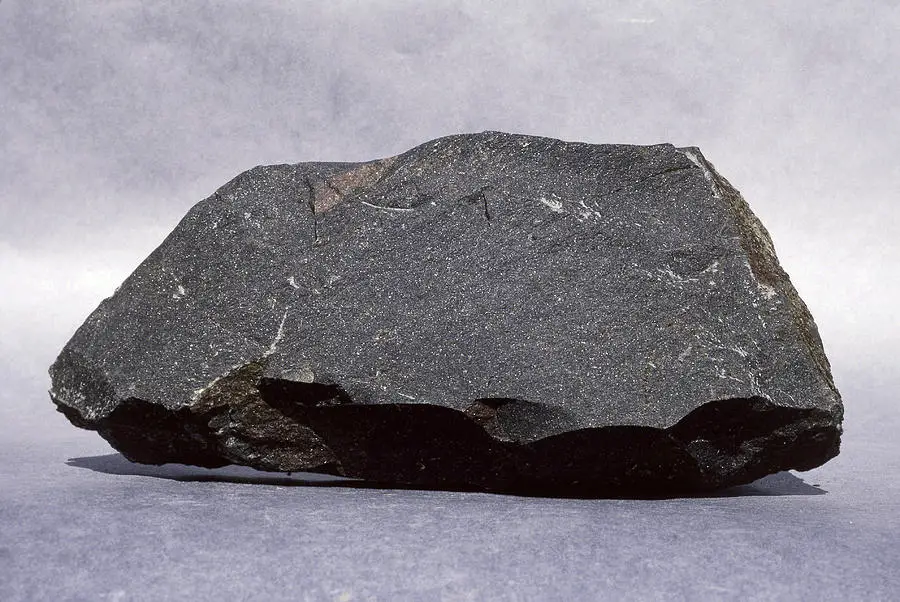
It is important to note that most of the mortar and pestle out there in the market are made of volcanic or basalt rock when you buy such mortar and pestle made of volcanic rock that is not cured, it feels a little gritty and fine particles of rock comes off it when you touch it.
Since the mortar and pestle are made of volcanic and basalt rock, it is porous and dirt coupled with debris get trapped in the little holes.
The grittiness that the newly purchased mortar and pestle possess is what we are aiming at removing through seasoning so that when we use the mortar and pestle to grind our spices, we will not end up grinding rock particles into our food or chewing the rock particles.
Of course, it will be terrible for the teeth to grind rack particles because we failed to cure or season our mortar and pestle properly before using them.
The need to cure a new mortar and pestle can never be overemphasized but you must also be careful enough to check and read properly the labelling on your newly bought mortar and pestle this is because some mortar and pestle have already been seasoned by the manufacturers before selling.
When you buy a mortar that has already been cured then there is no need to further cure the mortar before using, just rinse properly with clean water and start grinding.
On the other hand, if the manufacturer did not season the mortar and pestle then you must season it properly before you start using to avoid grinding rocks into your food or using your teeth to grind the rock particles.
So, you see, curing a mortar and pestle is very important because it contributes to the maximum efficiency of the mortar and pestle during use.
How to Cure a Mortar and Pestle
At the beginning of this article, we promise to give you the best procedures and techniques used in curing a mortar and pestle and making it efficient for everyday use.
You have as well learnt one or two things about the reason why we need to cure a mortar properly before using it to grind our spices if you have forgotten to permit me to take you back to the reason.
The importance of curing a mortar is the need to remove tiny rock particles from the mortar so that we will not end up grinding the particles together with our food or grinding the rock particle with our teeth while we eat.
That being said, if you are still reading this article then it means you are interested in finding out the exact technique or method you can apply when curing or seasoning your mortar and pestle.
If you just bought a mortar and pestle or you have one hanging somewhere in the kitchen that you are yet to use because you do not know the exact method or technique to cure it to get rid of those annoying rock particle, then keep a tab on this space because we are about to expose you to the most efficient mortar and pestle curing technique that we have used over the years to cure our mortar and pestle.
So we will get to give you the most updated information on how to cure a mortar and pestle.
Firstly, during the process of curing a mortar and pestle, it is important to note that there are different stages or steps in the curing process and each step should be followed with utmost concentration and accuracy if you want to achieve the best result.
In this article, we will be listing all the steps involved in the curing process as well as giving you a detailed explanation of each of the stages to enable you to do each stage of the curing process properly without missing a single thing.
If you are ready to do the practical’s then let’s move onto listing and explaining the stages involved and what to do in each stage to ensure an efficient seasoning of the mortar and pestle.
Ready? Let’s proceed.
Step One: Rinse Off
Any cooking utensil bought for use in the kitchen needs to be rinsed before any other thing this is because the kitchen is the place where we make our meals and therefore deserves the highest level of hygiene.
What you eat determines how healthy you will be.
Hence the first step in curing a mortar and pestle is to rinse off some of the grits using clean water.
In some cases, it is preferable that you fill up your sink with some really clean water and immerse the mortar and pestle in the sink and allow it to stay in the water overnight.
If you have a water pressure washer or a water hose then it is advisable to spray the mortar water from the hose or pressure washer for about five minutes.
When spraying the water on the mortar, you will notice that some of the debris will gradually be falling off, repeat this process as much as possible to reduce a good amount of the debris before you move on to the next stage but be assured that this is only the first step so it is not possible to remove all the rock particle in this stage.
One thing you should never do while trying to rinse off some of the rock particles is used soap or soapy water during the rinse off stage, using soap or soapy water will affect the mortar and pestle and make them taste like soap when you use it to grind your spices. So, in your best interest avoid soap in the stage and use only clean water.
Step Two: Use White Rice and Water
The second stage in the curing process requires the use of white rice and water and you should use a bowl of very inexpensive rice for this process to avoid wastage of rice.
For this second stage of curing a mortar and a pestle, follow the steps below to achieve the best result;
- Pour a small handful of rice into the mortar
- Make sure the rice is white as this will help you to detect the colour change
- Use enough rice to make sure that an even layer is formed across the bottom of the mortar
- Pour in a tablespoon of water into the rice that is already in the mortar
Step Three: Grind It!
Once you are done pouring a handful of rice into the mortar, then it is time to grind the rice.
This is where there seems to be a lot of work because you will have to grind the rice to paste.
Using one hand to support the mortar, firmly grab the pestle and start grinding.
Instead of pounding the rice it better to grind it in a circular motion as this will help speed up the process better than pounding continuously. Keep on grinding the rice in a circular motion until it becomes smooth and a paste is visible.
Step Four: The aftermath of the Grinding
Once you are done with grinding the rice, the white rice will turn into a grey coloured paste. The grinding of the rice helps to pull out all the rock particles and dirt hidden in the porous basalt rock.
Step Five: Rinse the Mortar and Pestle
You are done with what seemed like an eternity of grinding, now it is time to rinse the mortar and pestle and repeat until the white rice no longer turns to a grey paste but remains white even after pounding.
This seems like the most rigorous work ever, but it is worth it as long as you will enjoy your mortar and pestle without any remnant rock particles or debris.
Take the mortar to the sink and use a brush to brush out all remaining particle.
Step Six: Enjoy Your Well Cured Mortar and Pestle
This is the last step in the curing process and it is the step to enjoy you cured mortar and pestle without any form of rock particles or debris.
You can now use your mortar and pestle without any fear of grinding rocks with your teeth after cooking with spices ground with the mortar and pestle.
As stated earlier, mortar and pestle are one of the important utensils needed in the kitchen for day to day cooking and grinding.
If you are still reading this article it means two things, its either you have learnt to effectively cure your mortar and pestle or you have decided to add mortar and pestle your list of the cooking utensil.
If you have decided to add mortar and pestle to your cooking utensils then we have a bright and helpful suggestion that will help you to choose the best mortar and pestle to purchase.
Keep reading to find out!
Are you contemplating buying a new mortar and pestle that will serve as a multipurpose mortar and pestle, then you should check out the Thai Super-Size Granite Mortar and Pestle

The Thai Super-size Granite Mortar and pestle is one of the best mortar and pestle I have used to far in my kitchen.
It was really helpful each time I needed to grind chillies or mash ginger and garlic for my numerous recipes.
The bowl size makes it especially suitable for grinding bulky fresh spices like thyme. The heavy pestle grinds quickly and efficiently, doing all the work for you.
The Thai super-size granite mortar and pestle have approximately 5-6 cups capacity which enables a large quantity grinding at once.
It is easy to clean; you just have to rinse with water and then drip dry.
If you are looking for a mortar and pestle that will offer you the real professional grinding experience then this is your best bet!
Do we hope this article has succeeded in providing all the information you need about how to cure a mortar and pestle?
If you have more question please drop them in the comment section and we will attend to all your questions about how to cure a mortar and a pestle.