Seasoning a granite molcajete is very important. Especially if you just bought it and you are getting it ready to be used. In this post, I will be sharing with you the detailed steps you should consider when you intend to season your new granite molcajete.
For some of us who the granite molcajete was passed from our grandparents, there will be no need to know how to season it before using. Consider yourself lucky because the tool would have been seasoned from years and years of use.
This is an added advantage because the tool is now familiar with the use and you are likely not to experience and downs while using.
But what if you just acquired a new granite molcajete? What is the first thing to do before use? Is it to season the mortar and pestle? And if yes, how?
That’s what we shall be looking into in this post today.
And just to be clear, once you have purchased a new granite molcajete, there is a need to cure and season the tool first before using it for anything.
Read on as I hold your hands and walk you through the process of properly seasoning a granite molcajete such that it will be very much prepared for first use.
You should understand that every process involved in seasoning and curing a molcajete is very important as the sole purpose of doing this is to reduce or even eliminate the grit that releases from the volcanic rock during use in your recipes.
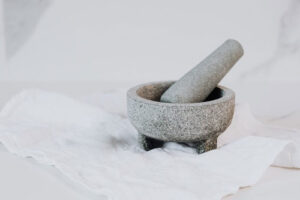
What we are about to learn how to season is a Mexican version of the mortar and pestle. Molcajete is a 3-legged bowl that can be likened to that of a squat animal.
The mortar is carved from basalt, a volcanic rock. My first encounter with the impressive version of this mortar and pestle was in a Mexican restaurant and understood that it is used for making many Mexican recipes. I’ve also learned that the pestle is called tejolote.
By now, you already know that it is an important thing to season any mortar and pestle that you just purchased that is made out of granite/stone.
Molcajete features a porous surface that will likely release particles of stone and grit into your food upon first use. So what you do to the tool when seasoning will prepare the surface for the first grinding and also eliminate these stone particles. I’m sure you don’t want grit in your ingredients.
So the seasoning process of a granite molcajete simply involves washing the mortar and pestle with a scrubby brush and air drying. Afterward, it is seasoned by grinding rice in the mortar bowl to powder.
Then, seasoning with recommended spices to form a paste and then finally washing again using a scrubby brush and leaving to air dry.
Kindly note that when seasoning a molcajete or anytime you have to clean it, soap or soapy detergent must not be used.
Also, the process of completely seasoning a granite molcajete will take up to two days or even three. So if you have a Milestone recipe that requires the use of your new granite molcajete, you know better than to do this late. It means that you should prepare ahead of time.
You now have a glimpse of what we will be looking into in this post, but that is just a highlight. Let’s now dive into the full step-by-step details on how a granite molcajete is properly seasoned.
Table of Contents
How to properly season a granite molcajete

It is time to learn how to cure, or season, your new molcajete, and how to cook with one. I encourage you to pay attention to every detail so that you don’t get the process wrong.
It will also help you because once you know about this thing, you can always transfer the knowledge to your neighbors or apprentice at work or in the restaurant.
We all know that the molcajete is great for making traditional authentic sauces, salsas, guacamole and so much more. The best part is that you can even cook with it. But before you will be able to do all these with your new molcajete, you need to cure and season it.
Before we proceed I’d like to mention that most of these instructions are based on the instructions from the manufacturer of the molcajete. I have done deep research and personal experiment with the molcajete myself and I don’t want you to go through the stress of correcting mistakes.
Let me prepare your mind that the process may take a longer time than you think, for some, you may have to repeat some certain process but it is all worth it.
Step one: Soak the granite molcajete
Other experts may advise that you spray the molcajete as the first step but it is as effective as soaking it. Whichever you choose, make sure you do not use soap and I can not stress this enough because many people make this mistake.
If you are going to hose off the molcajete or spray it, make sure you do it continuously for 5 minutes so that you get every nook and cranny. But as I recommended, you can soak the molcajete by allowing it to sit in warm water for two hours. After that remove it and allow it to air dry for 12 hours.
While you leave the mortar and pestle to air dry, prepare aside 1/2 cup white rice soaked in 1/2 cup water. This will be useful for step three.
Step two: Grinding white rice to a fine powder
It is time to do some exercise with the hand. This step marks the first grinding with the molcajete.
The first thing to do before proceeding to grind the molcajete is to place a towel on your countertop so that it will protect your counter from scraping. A lot of users complain about this and I just wonder why they forget to place the mortar on an old towel before grinding.
The towel will also catch any flyaway pieces of rice so you won’t have much to clean. Like I mentioned in step one, wait for the mortar and pestle to air dry and after then, add 2 tbs of dry white rice to the molcajete.
Start grinding the rice using the pestle, and to be effective, make sure your grinding touches every area in the mortar bowl. You want to do this by grinding in a twisting circular motion.
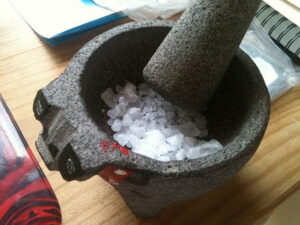
At this point of grinding, you will observe that the powder rice is turning to grey color, this indicates that the rock sediment is being polished off the surface and crevices. Continue grinding until the rice turns into a fine powder and empty when done. It is ideal to repeat this process three to four more times.
Step three: Grind soaked white rice to a fine paste in the molcajete
Remember the 1/2 cup white rice soaked in 1/2 cup water you prepared aside in step one? It is time to grind them into a paste in the molcajete mortar bowl and with the use of the pestle too.
After adding the mixture into your bowl, take the pestle and start transforming the rice into a paste by grinding.
Make sure this paste is not concentrated in only one part of the molcajete mortar bowl. You want to make sure that while you grind to paste, you are moving the mixture up the side of the bowl so that no areas will be left unseasoned.
Just as with how the result of the rice powder turned out in step two, the paste may begin to take the Grey color look and this is expected and you should know why by now.
Similarly, this process should be repeated three times. A good point to know that you have successfully performed this step is when the paste is no longer tuning into Grey color. This is self-explanatory.
Upon grinding the final rice to paste, and you can observe that it is completely white as it should be, rinse the bowl thoroughly, and get your recommended spice ready – Garlic, kosher salt, and Serrano pepper.
Step four: Season the molcajete with kosher salt, garlic, and pepper

Most people consider seasoning the molcajete with recommended spice as the last step but it isn’t and you’ll get to know why.
Well, this step is very crucial because this is where the final seasoning process comes to play.
Gather your spice, that is the garlic, kosher salt, and pepper and add all in the bowl. The ideal amount to use is two cloves of garlic, one serrano pepper sliced, and 1 tbs of kosher salt.
I do not enjoy this particular step because of the smell of garlic but when seasoning a new molcajete, you have no choice dear.
Transform these spices in the bowl to paste using the pestle and as with the rice paste, make sure you touch every area.
After you have turned it to paste do not just wash it off immediately. Allow it to sit in the bowl for at most four hours. But not lesser than two hours.
By then, you can rinse the mixture out of the molcajete using warm water. Again, No soap or soapy water.
Step five: Air dry all the way
You have been able to successfully season your granite molcajete mortar and pestle. The last and final step is to allow the tool to air dry and this will require overnight drying.
You can see that the process may take you more than a day.
While you wait for the molcajete to air dry, you can go online and look for an amazing recipe that can be prepared using the precious granite molcajete.
The product may also come with a user manual and this is the best time to read it to know more about your newly acquired kitchen tool.
Take pride in your well-seasoned molcajete as your rest your arms from all the grinding work.
Conclusion on how to season a granite molcajete
As you can see, the process involved in properly seasoning a granite molcajete is not as complex as many as told you it is. All you need to do is follow the instructions in this guide and you can do it without stress at home.
The molcajete mortar and pestle are very useful and versatile. It can be used for crushing and grinding spices. It will come in handy when making salsas and guacamole, sauces, and more.
The mortar allows you to get the best and preferred consistency of food ingredients as you grind them in a mortar bowl using the easy-to-handle pestle.
Adding to the advantage of using a normal mortar and pestle, the molcajete does not require and complex assembling once purchased and does not make noise when in use.
It is a great addition to your kitchen and when you are serious about getting the best from your molcajete, the first thing to consider is curing and seasoning it properly.
I hope this guide has been able to show you how to properly season a granite molcajete and how long it will take you to do so.
Most granite molcajete mortar and pestle usually come with instructions that will tell you to season with rice only. So you should check the manual before doing anything to the mortar and pestle.
If you have any other area where you find it difficult to season, use or maintain your granite molcajete, you can let me know in the comment section below and I will be glad to answer.
