
Sincerely, as you use your meat grinder frequently, you should expect issues like clogging, the bluntness of grinding blades, and other technical issues related to using kitchen essentials.
Table of Contents
Find out why your meat grinder gets clogged
Clogging in a meat grinder is usually caused by;
- Sinew in meat and bones
- Frequent grinding of strong parts of meat like connecting tissues, ligaments
- Overstuffing the meat grinder or going beyond the stipulated grinding amount per time.
- Improper cleaning and care of the meat grinder
- Blunt meat grinder blades
When people grind their meat in meat grinders, clogging as a very common meat grinder issue is inevitable. Even without considering the meat grinder’s capacity, some individuals overuse meat grinders to embrace fatty bones and components.
Everyone must remember the fact that not all Overstuffing functions the same way. If you know exactly what to do and maintain it, it is not too hard to solve.
Some grinders for meat are susceptible to clogging. So, bear in mind that the responsibility for cleanliness is paramount.
Not all meat grinders are designed to do the same job-some can easily cut chicken or meat bones, while others will break down if the meat has as much as an ounce of fat.
So, you should expect your meat grinder to get clogged from time, and while this may happen, you must be prepared to take actions that will reduce the frequency of your meat grinder getting clogged.
How to Prevent your meat grinder from clogging
Cut off excess sinew and fat from your meat prior to grinding
It is not a problem with most upscale electric meat grinders, but you might want to do this phase before running an entire meat grinding process if you are using an entry-level meat grinder made of plastic for its parts.
Do the same for the bones
Some people want to grind the meat bone along with the meat to feed it to their pets, but if your grinder is not fitted with the parts required to grind the bones effectively, you need to get your hands on a dummy grinder.
Maintain the clean-up of cutting plates and blades
These are the parts where you cut your meat and grind it, so you need to make sure they’re sharp. Over time, repeated meat grinder use will dull them, so it is best to separate crucial components and sharpen the blades.
Cleaning the blades appropriately is imperative. Corrosion occurs on blades and, because of the origin of corrosion, it can dull the blades. Using a wet cloth or towel, make sure you quickly dry them properly after washing the blades.
Using a dry towel, promptly clean the blades and plates and put the pieces on your countertop to dry completely.
Do not assemble them unless they are scorched since corrosion will set in, especially if you are using a grinder that is not made entirely of stainless steel.
In a situation where your Meat Grinder gets blocked, here is how to properly clean your meat grinder;
Meat Grinder Clogged? Here’s a Quick Hack to get it working again
- Step 1: Feed bread into the grinder
- Step 2: Disassemble the grinder
- Step 3: Soak the parts
- Step 4: Scrub the parts
- Step 5: Dry the parts
If your meat grinder begins to clog, the cutting blades and plates need to be disassembled regularly to wash them. You need to clean the parts if you notice some sluggishness in the grinding process.
Washing the parts in lukewarm soapy water or considering water combined with a pinch of baking soda is best for their interests. Baking soda quickly eliminates oil residues.
Step 1: Feed bread into the grinder
Grab two or three slices of bread before you disassemble the unit. Feed them, just like you did with your meat, through the grinder. Using these to absorb the oil and grease of the meat and force out any stray bits inside the system that are swallowed.
Step 2: Disassemble the grinder
Second, if it is electronic, unplug the unit. Break it down into its components, then. These can differ according to form and model, but a meat grinder usually consists of:
- A feed funnel, pusher, and hopper (usually a single piece through which the meat is fed into the machine).
- A Screw (the internal piece that pushes the meat through the grinder)
- A Blade
- A plate or die, or die (the metal piece with holes where the meat comes out)
- A blade and plate cover
Step 3: Soak the parts
With warm water, fill a sink or bucket and apply some dish detergent. Once complete, put the disassembled parts inside. To loosen any residual grease, oil, or meat, let them stay for about a quarter of an hour.
Do not soak any motorized parts if your grinder is an electric type. Use this time, instead, to clean a damp cloth down the outside of the base and then a clean one to dry it.
Step 4: Scrub the parts
To cleanse the screw, cover, and blade, use a sponge. When holding the blade, be vigilant because it is sharp and, if mishandled, can easily cut you.
To clean the inside of the feed hose, hopper, and the plate’s holes, turn to a bottle brush. When finishing, rinse each part with clean water.
Don’t hurry this phase through. You want all the traces to be eliminated to not end up with a germ and bacteria breeding site. So if you think you’ve scrubbed plenty of something, clean it a little more.
Step 5: Dry the parts
Wipe them down with a clean towel first to get rid of excess water. Then lay them to air-dry on a fresh towel or wire rack. Before putting your grinder away, prevent rust and oxidation by waiting until they are scorched.
Step 6: Storing Your Grinder
This is as important as washing your grinder after use. The way you store your grinder components will be instrumental in determining how long you will use them.
Here are some ways in which you can preserve your grinder;
Oil any metal parts
Keep your grinder well lubricated during storage to prevent rust from developing. Using food-grade mineral oil to fill a spray bottle. Then mist all of your grinder’s metal parts with an even coat of oil (excluding electrical components).
Pay careful attention to the pusher and screw because as you feed it through the system, these come into the most contact with your meat.
Bag each part individually with rice
Place each part in your grinder with its own sealed container plastic bag. Then add to each bag a handful of rice.
The rice is not strictly required, but if you store your parts in the freezer and live in an area with high humidity, it will absorb any present and future moisture, making it a good idea.
Store in your freezer if possible
Bear in mind that when its components are cold, the grinder works best. If there’s space, hold any non-electric parts in the freezer. However, don’t worry if you can’t commit too much space to long-term storage.
Instead: In the meantime, store your parts somewhere dry. Imply put them long enough in the freezer to cool until your next use (roughly an hour).
Sterilize oiled parts with bleach before use
Mix one gallon (3,8 L) of water with a tablespoon of bleach. With this remedy, fill a spray bottle with it. Then spray before storage each metal component that you oiled to make sure they are disinfected.
Then rinse them thoroughly with clean water to remove all the remnants of bleach.
What meat grinder should you buy?
Meat grinders are a standard device, but tidiness is a must to avoid the germs and bacteria that come from residue if you deal with raw meat. Washing your grinder, however, is no different from cleaning other cookware.
Generally, three-class meat grinders;
- The Electrical Meat Grinder
- The Manual Meat Grinder
- The Commercial Meat Grinder
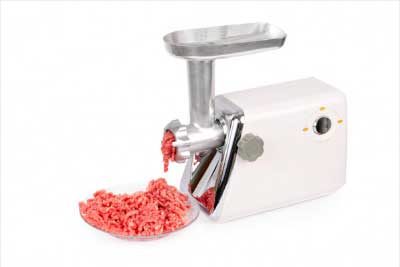
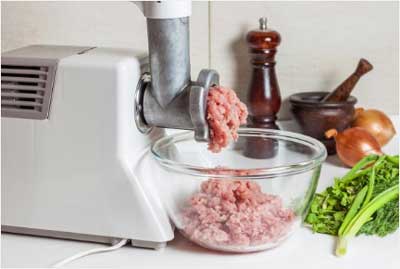
Electric Meat Grinder
To grind the meat, electric meat grinders use motor-powered engines, as the name implies. This makes them faster than conventional techniques since to achieve the same result; less user effort is needed.
One essential function has to be served by electric meat grinders. Without forcing the user to strain themselves, they are made to grind several meat pounds like using a manual grinder.
Electric grinders can cost more money than average than manual grinders, but their powerful motors help to grind through the meat quickly.
Pros
Cleaner and Safer: Electric meat grinders don’t demand that users use both hands. Since you seldom come into contact with meat, you are less likely to run the contamination risk. Since the heart is more comfortable, it will not be exposed to high temperatures for too long.
Easy to Use: All you have to do is have your grinder assembled. Then you need to plug in and switch on the grinder. This feature is better for plug and play than manual grinders, where you will have to bolt it to a surface. And, the meat tray makes electric grinders easier to eat. Electric grinders consist of a food pusher that makes it simpler for meat to pass through the machine.
Extra Power: When using an electric meat grinder, you will have engine power on your side. You’ll have to grind out more pounds per minute depending on the wattage, horsepower, and other parts of the grinder than a manual grinder. You will be able to use an electric meat grinder to grind out hundreds of pounds in one hour.
Cons
Expensive: Electric grinders are more expensive and cost more money than manual meat grinders. There are some cheaper models, but a large price tag comes with the better quality grinders.
Portability: To operate, every electric grinder model needs a power source. Electric grinders are also more challenging to lift, which makes carrying them more tedious.
It depends on your personal preferences and how much you plan to spend on getting the best grinder. If you only have to grind a few pounds of meat, get a manual meat grinder on a couple of occasions.
The electric grinder is the more rational choice if you are grinding large volumes of meat and need something to work at a rapid frequency.
Manual Meat Grinder
For areas that do not have enough energy, manual grinders are perfect. In secluded, remote areas such as cabins where a good energy source isn’t always there, most people prefer manual grinders. Plus, they are heavy, making them practically incapable of breaking down.
Due to their reliability and durability, many shoppers pick them. If you are someone who has patience and the ability to grind meat with your muscles, a manual grinder is an excellent choice for you.
Pros
Portability: When there’s no electrical source nearby, manual grinders operate. For it to work correctly, you are not bound to the need to plug in the unit. Basically, in almost any case, you can use your manual meat grinder.
No Extra Electrical charge: Since manual grinders do not use electricity, using them will save you a lot of money. You don’t need to think about spending more on your energy bill if you grind your food every day.
Affordable: The Manual meat grinders do not cost as much as the electric ones. For learners and users on a tight budget, manual grinders offer quite a lot.
Cons
Health Issues: When cutting raw meat, you should be very patient. For an extended period, you do not have raw meat sitting in warm temperatures. Since a manual grinder will take you longer to cut into beef, you will have to freeze up larger batches of meat and use them once at a time.
Too Much Physical Effort: Some folks find the use of manual grinders strenuous. It can take a long time to grind meat, especially if you have to cut through larger batches.
No Electrical Motor: With manual meat grinders, the power of your hands is reduced. You will never cut meat with the same degree of precision and efficacy as an electric meat grinder.
Commercial Meat Grinder
Such grinders are designed for customers who want to sell meat of some sort. For domestic use, commercial meat grinders are not recommended. Chefs, butchers, and individuals prefer to use industrial grinders in similar industries.
While commercial grinders are a considerable investment, they also have an enormous payoff and reward. Precision and pace are critical considerations for professionals that come into play when purchasing a meat grinder.
Commercial grinders are ideal because, in this case, they go into action. Another benefit is that commercial heroes are massive in size, in one movement, can cut through large amounts of food and meat, and have various settings.
Commercial grinders are costly, but on investment, they have a great return. For chefs trying to run a successful business, the standard and most recommended choice are commercial grinders.
Conclusion
Now you know why your meat grinder gets clogged and what you need to do to prevent clogging.
Ensure that you go through the proper steps in cleaning your meat grinder as described above, and you are good to go.
Let me know if you’ve got any questions.